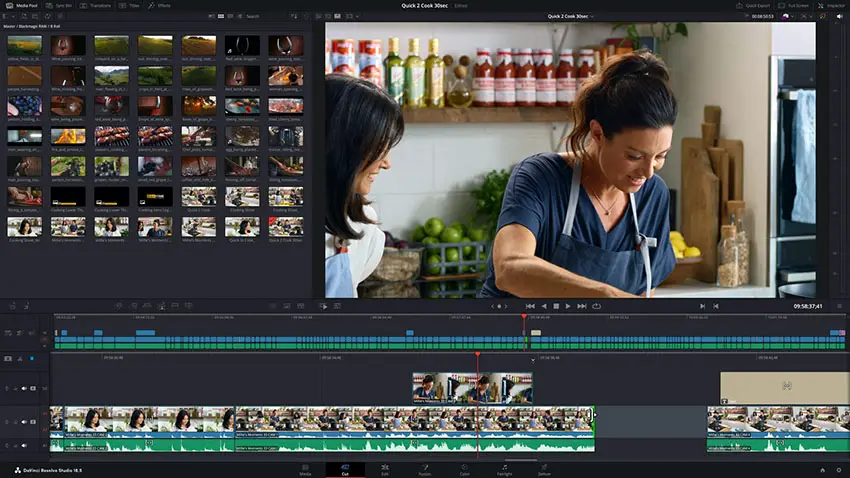
Working on large projects in post-production can be a problem. The biggest is making sure all your files are well organized and easy to find. Oftentimes, as the project grows and grows, that one clip you wanted to save for later has now become lost in the numerous folders in the media tab.
Any NLE can suffer from this issue but each piece of software is unique, so today we are going to focus on Resolve 18. Alex Jordan from Learn Color Grading has the details on how to find files, how to get them organized, and how to use tags, which is essentially the biggest part of this whole tip.
Jordan points out that the quality of the final edit is going to be dependent on how effectively you can navigate and find the shots you need. You only have so much time to spend editing and every second counts.
The best place to start after dumping all your footage into the master media bin is to make some bin folders. Depending on the size of the project, especially if it is on the smaller side, you might be able to get away with this technique alone.
Just make a name you understand, such as “A Roll” or “Coffee” and just drag-and-drop your files into the folders.
You may quickly find after making a few bins that you might have some clips that could belong in two or more folders.
This can make a mess of your nicely organized bins. Smart bins, or smart folders, are a way to solve this issue when used with tagging.

Image Credit: Blackmagic Design
While the Media page is a good place to work with your file organization the Edit page also has plenty of control. You’ll want to select a clip and then in the top right, you’ll want to click the Metadata tab. This is where you’ll find a lot of the information about the clip and where you can add more data.
You’ll see some of the basic information about the format, frame rate, etc. when you first click it. At the top right of this area you’ll find a dropdown menu that will let you select the different types of metadata you can access. We are looking at the “Shot & Scene” group.
When you select it you’ll see a box called Keywords where you can type in whatever you want. Be careful as it will be showing the currently selected clip. Don’t want to put the wrong info into the metadata. Load up a clip and start adding some keywords based on the content of the clip.
Now that you have some keywords added to your clips you can start using them to find specific clips. In your bins you’ll find a section called Smart Bins. In here there should automatically be a Keywords folder. Look in there and you’ll find a bunch of smart bins that were automatically grouping everything with the same tag.

Image Credit: Blackmagic Design
Since you can use multiple tags on each clip you can now have the same clip show up in multiple relevant folders. Before if you just manually organized your bins you would only be able to put the clip in a single place. No need for copies and no need to make a bunch of manual folders.
Smart bins/folders can be configured in other ways as well. You can create a smart bin that brings together all clips with the same types of keywords. To do this, in the Create Smart Bin box you’ll find “Metadata- Shot & Scene” and then you can choose “Keywords” and “matches all” and put in the keywords you want to use. Now you’ll find everything with those keywords.
Spending the time to do this can be so worth it when you get to the point that you have too many clips to sort through easily. A little work up front can save you so much time later.
Have you ever worked with metadata in Resolve to help stay organized?
[source: Learn Color Grading]
Order Links:
Disclaimer: As an Amazon Associate partner and participant in B&H and Adorama Affiliate programmes, we earn a small comission from each purchase made through the affiliate links listed above at no additional cost to you.


