Green screens can be a lot of fun and even if you aren’t planning on using them all that much you should still try them out and learn how to use them properly.
They can be finicky though. You have to consider all aspects of the shoot, including lighting, your subject, camera settings, and even the editing plan if you want to do a good job.
The guys over at Cinecom.net have been making use of green screen effects for a while and love showing off some of their tips. If you are interested in learning something here is a group of 20 tips.
1. Blue or Green
Understand which color you should be using. Green and blue are the best options because they are the farthest away from skin tones on the color wheel. This contrast helps pull a cleaner key.
Green is generally considered to be better for bright scenes while blue is often chosen for working in darker shots and with blonde hair.
2. Clothing
You’ll also want to consider the clothing your subject is wearing. Since blue is more common in clothing the green screen often wins out. One other thing to watch for are reflective or shiny surfaces.
Often reflective or even very dark (black) clothes will pick up some of that green from the background. This spill will make it hard to clean up later. And make sure nothing is unnecessarily hanging off the subject.
3. Get Rid of Wrinkles
You’ll want to get rid of all the wrinkles you can when you set up your green screen. A combination of ironing, steaming, and getting it tight will all work. This will help get a clean key later on.
4. Tilted Towards the Ground
If your space allow you should have the green screen tilting towards the ground. This will help minimize spill and make it easier to evenly illuminate it.
5. Lighting Zones
You’ll want to set up lights specifically to illuminate the green screen and keep them separate from what you are using to light your subject. This will prevent green spill.
6. Lighting Your Subject
When you light your subject you’ll want to think about what you imagine the final shot will look like. Ideally use the real background as reference. Then you should light your subject to match it. This will help make it more convincing.
If you want to match an outdoor shot with a green screen shot then your best option may be to go shoot outside. Just make sure you time the lighting and weather to match up.
7. Use Zebras
Zebras are a useful tool found in monitoring controls that will help you ensure you have things exposed properly. You’ll want the green screen to be reading at about two stops lower than your subject. This helps create the necessary contrast.
8. Avoid Hot Spots
Use the zebras and other exposure tools to avoid hot spots on the background. You’ll want that background illuminated as evenly as possible.
9. Motion Blur
With normal 180-degree shutter settings you’ll get some motion blur. This can make it more difficult to pull a key. What you can do is speed up your shutter speed to minimize this blur.
You can use plenty of tools in post production to bring back that motion blur later to sell the effect.
10. Tracking Markers
If you are planning on matching camera movement or simply adding some later you’ll want to add some markers to the background or add some objects to the scene so that the software has something to lock on to.
11. Use RGB Lights for Fake Green Screen
If you don’t own a green screen but you own some RGB lights you can often set them to a chroma green setting and shine them on a neutral background to create a green screen.
Also, if you shine the chroma green setting on an actual green screen it can help make it an even more smooth green.

Image Credit: Adobe
12. One-Click Key
If you have a fairly good setup you might be able to get this done with a single click. Using the Keylight effect in After Effects you can use the eyedropper and just click on the screen. If you were good you might just have a perfect key right now.
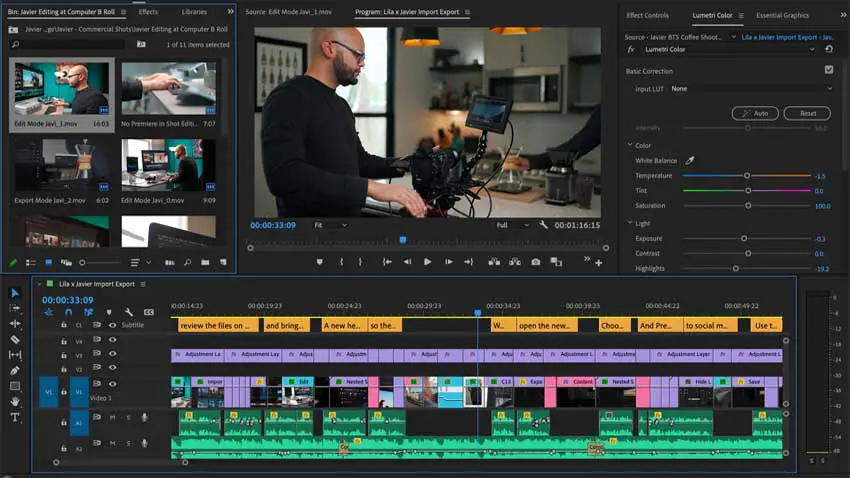
13. HSL Secondary
To fine tune your key you can head to the Lumetri panel and find the HSL Secondary. Find the green, select the green, and then reduce the contrast and bump the saturation. This should smooth out the green screen.
14. Clean Spill
You can also use the HSL Secondary to clean up green spill as you can select it and then reduce it by adding more magenta or desaturating. There are some tools for specifically removing spill if you need it.
15. Noise Removal
You’ll want to clean up noise in your shot/background to help get a cleaner key. They prefer the Red Giant tools for this though Adobe has their own built-in options.
16. Zone Keying
Complex subjects may benefit from using a series of masks on each part to get a cleaner pull from each area. Some might be simple and some might be harder. If you do them separately it might make it easier than a one-size-fits-all solution.

Image Credit: Adobe
17. Rotoscoping
Green screens can make it super easy to rotoscope your subject. The background contrast is a perfect fit.
18. Keying Out Shadows
It’ll likely be too hard to save any shadows from your green screen so you’ll want to just key it out right away and add it back later. You’ll want to pay attention to the original shot when you add it back.
19. Avoid Focus Pulls
Don’t do focus pulls when using a green screen. Without a sharp subject and edges the key will be much harder to pull. Just add it later with a blur effect.
20. Take Care of Hair
The hardest part of most keys is working with hair. It can sometimes have a mind of its own. Think about things before you hit record and come a little prepared. Sometimes you can get rid of some of the harder aspects with just a little bit of gel or combing.
That was a lightning fast set of green screen tips. What did you think?
[source: Cinecom.net]
Order Links:
Disclaimer: As an Amazon Associate partner and participant in B&H and Adorama Affiliate programmes, we earn a small comission from each purchase made through the affiliate links listed above at no additional cost to you.


