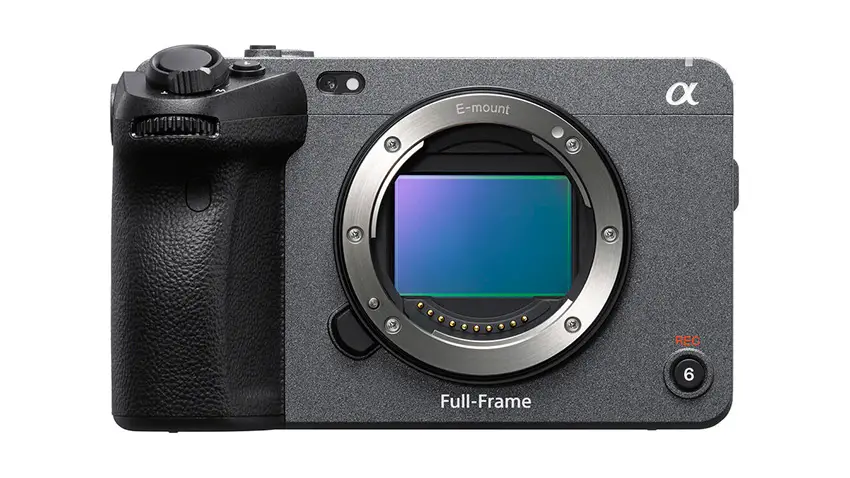
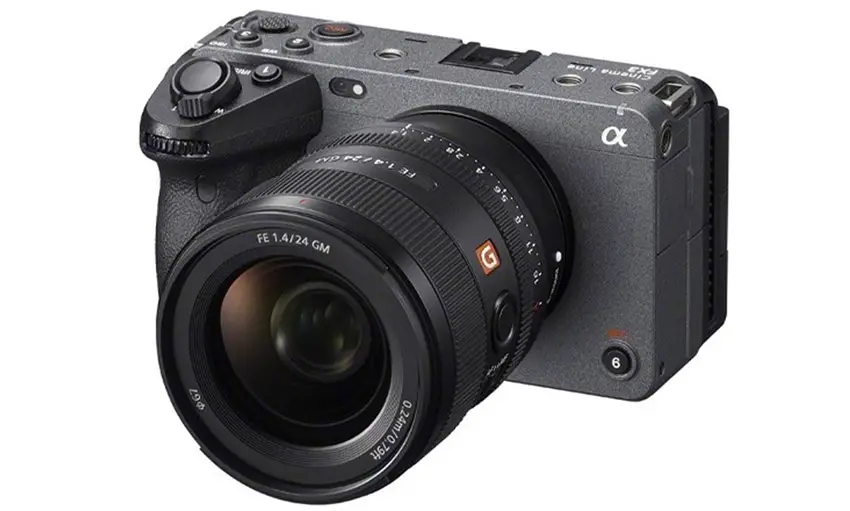
Making the most of any camera demands customization. Manufacturers, to their credit, have been increasing the amount of customization available on their cameras to help out. Looking at the Sony FX3 you will find 12 buttons, three dials, and you can even add the one on select lenses if you want. That’s a ton.
If you want to become a faster, more efficient shooter you should make use of these controls. Fast, intuitive access to your settings is a game changer. If you want some advice on where to start, you can see how filmmaker Alex Perri has the buttons on his FX3 configured.
Even if you have been using some custom buttons on your FX3 it might be time to reevaluate now that version 2.0 has added so many new functions.
Finding the options is the easy part. Head into the menu, head down to setup, and find Operation Customize. Here you’ll see all the options.

Image Credit: Sony
You’ll want to head into the second option with the video camera icon as this is assumedly the main mode you’ll be using your FX3 in.
These are all the buttons you can customize:
- 6 on the rear
- 5 on the top
- 1 on the front
- 1 on select lenses
- 3 dials/wheels
Rear
The first button on the list is Custom Button 5 on the camera body. It is by default set to focus magnifier and there actually isn’t much reason to change it up. It is labeled that way after all.
Number 2 in the menu is Custom Button 4 and that is set to Base ISO Switch. Using the new Cine EI modes this will let you quickly switch between the two ISO settings.
Up next is the Center Button. These he has configured to select LUT so he can quickly run through all the available built-in and user LUTs.
For the Left Button on the main wheel he kept it at zebra and for the Right Button it remains peaking, as labeled.
The last option on the rear is the Down Button. He set this to metering mode to make it easier to get the right exposure. Not something many think about, but being able to change it quickly will make it something you might use more.
Top
The next most customizable area of the camera is the top.
Custom Button 1 gets assigned Focal Length for stabilization. This is useful if you use all manual or adapted lenses as it’ll optimize the IBIS system for the focal length.
Custom Button 2 remains at its default with White Balance.
Custom Button 3 should get tweaked to ISO/EI since that allows you to access the range of ISO or EI options that you may have.
The Multi-Selector joystick can be pressed in as the fourth customizable button and he selected AF/MF toggle. You can then quickly switch between the auto and manual focus with a simple button press.
Number 5 on the list is the big Rec button. Probably best to leave it as the big Rec button.

Image Credit: Sony
Front
The front is much simpler that the top or rear. There is a single button (apart from the lens release).
Custom Button 6 is also set to start/stop recording. Alex keeps it set there, but it is open if you want to make use of the button for something else.
Lens
On many of Sony’s lenses there is a customizable Focus Hold button. It may not always be an option so don’t set it to anything super critical.
By default it is for focus hold, which could be very useful for handheld shooting.
It’s another one you can feel free to customize to your liking.
Dials/Wheels
There are three dials/wheels and they are generally reserved for your main exposure controls: aperture, ISO, and shutter speed.
The front dial is set to aperture, the rear is set to ISO/EI, and the main wheel is shutter speed.
Fast access to your exposure is necessary.
What do you think about these controls? Do you have some different settings for your own camera?
[source: Alex Perri]
Order Links:
Disclaimer: As an Amazon Associate partner and participant in B&H and Adorama Affiliate programmes, we earn a small comission from each purchase made through the affiliate links listed above at no additional cost to you.


