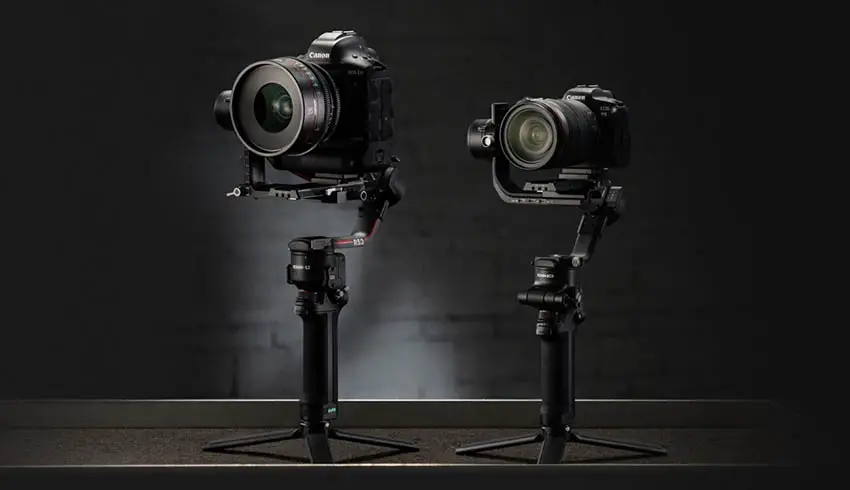
Gimbals are fairly good straight out of the box these days. The handles and controls are perfectly serviceable without spending another dime, especially mature systems like the DJI RS 2 which has just gotten better and better. Once you start using them for extended shooting days or want to mount some other accessories to your rig then you might find the form factor could use a hand.
One option is a ring grip, though official options can be pricey. If you want to learn how to build your own on a budget this guide from Bestboy Adam can help.
This setup is not for everyone, the DJI RS 2 is already a very capable one-handed gimbal and is compact. Now, if you are planning on mounting some additional accessories the two-handed grip helps keep thing balanced and provides better points for mounting.
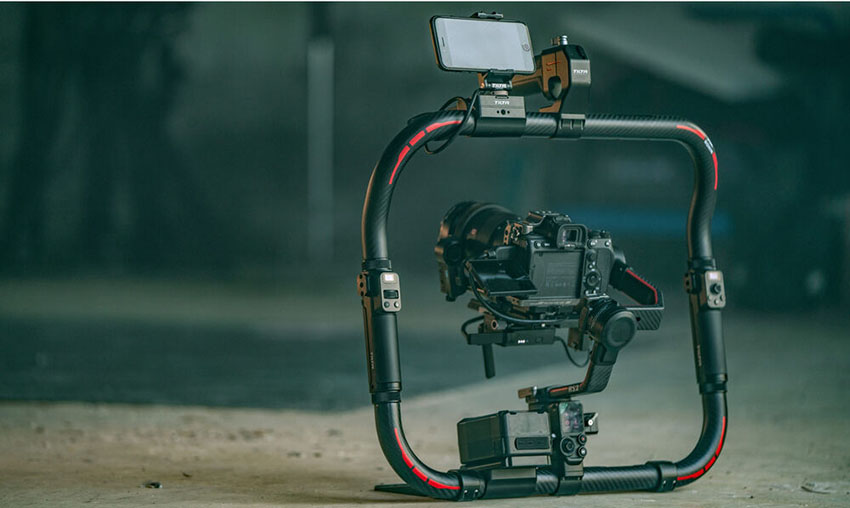
For an off-the-shelf option, there is the Tilta Advance Ring Grip. It’s lightweight and custom designed for the RS 2. It comes with both left and right handles which you can mount in a variety of configurations, plus each handle has controls for adjusting things like focus and other motors.

Image Credit: TILTA
A power adapter then makes it easy to connect various powered devices from a single area without having too many long cables running everywhere. And, you can configure the gimbal handle as a top handle.
The entire kit is definitely way more functional than a barebones one-handed gimbal. However, the extra pieces add a ton more weight and size. It’s not something to just throw in your kit for an average day. It is more ergonomic though. And, it’s very expensive.
If you want to make this system more manageable for your shoots, since holding 20 lb at arms length isn’t a fun time, then Adam has a DIY support system.
You’ll need to start with a vest. Getting weight off your arms is important. Adam recommends the Tilta Float belt or STIHL RTS. His DIY method permits for some straightforward modifications to get it all mounted together. The basic components are all simple and do the job well.

Image Credit: TILTA
So, what else do you need?
- 30mm aluminum or carbon fiber tubes
- 20mm carbon fiber tubes
- Threaded rod
- 32mm pulley
- T cross connectors and clamps
- Global truss and shoulder clamps
- Steel rings
- Fitness resistance bands
- Screws and washers
For the main frame design, Adam used the 30mm tubes. He opted for aluminum since they are cheaper. You’ll take these tubes and connect them with some T cross connectors. You’ll have two shorter rods on either end of a long rod. This is the main frame and the long tube should stretch from your waist belt connection up to around your shoulders.
The next part is getting the adjustable arm mounts configured. This part is what gives you free movement. You’ll need some 20mm tubes, the 32mm pulleys, small and large clamps, and a threaded rod a little longer than the top tube. Secure it with some nuts and washers so that a little bit is sticking out of each end of the top tube.
This is where you will mount the pulley. Twist two clamps together but not all the way so that they have a little bit of movement and then attach these to the pulley. Do this for each side.
Once that is set up, grab your 20mm tubes, recommended to be carbon fiber, and put them on the open end of the clamps on each side. You can make an adjustable length option by using a tube adapter and multiple-sized carbon fiber rods.
To manage the weight, you will need some sort of resistance mechanism. Springs, bungee cords, etc. are all fine, but Adam opted for some basic resistance bands normally found in the gym. Put these in a rope cover to make them look a bit better and protect them.
Using some connector clamps on each end of the arms you can then attach some steel rings. Do this for the back of each arm and the bottom of your frame. Between these rings, you connect your resistance bands. Also, add some clamps and rings to the front of each arm for the next step.

Image Credit: DJI
Next, you’ll need to connect all this to the gimbal. On the center of each side of the ring, use clamps or threads or another mounting method to add some steel rings. Now, some elastic bands can be used to attach the arms to each side of the gimbal ring. It’ll provide a nice, stable platform that will absorb some vibrations.
Getting it attached to your belt or vest should be easy. Just mount some additional 30mm clamps to it and the frame should easily be able to be secured onto it. Now you are ready to shoot.
This setup permits for near-ideal customization to your kit and body. You should be able to hold anywhere from 10-30 lb with ease. Stronger components might actually increase this load.
The key is that you should be able to hold more weight for longer without getting super stressed out. It’ll also give you an even more stable platform for shooting.
If you are looking for an advanced system but a conventional rig is a bit out of budget this DIY method seems like a good deal. You will need to build your own ring if you want to get this down to a barebones price though since the Tilta ring does add to the cost.
The footage looks great in all the samples. Are you interested in tackling this DIY project?
[source: Bestboy Adam]
Order Links:
- DJI RS 2 Gimbal Stabilizer (B&H, Amazon)
- Tilta Advanced Ring Grip for DJI RS 2 (B&H)
- Tilta Float Gimbal Support System for DJI RS 2 (B&H)
Disclaimer: As an Amazon Associate partner and participant in B&H and Adorama Affiliate programmes, we earn a small comission from each purchase made through the affiliate links listed above at no additional cost to you.


