As John Robert Wooden, the famous NCAA basketball coach, once famously said, “If you don’t have time to do it right, when will you have time to do it over?”.
In filmmaking, you never get a second chance unless you’ve got a lot of money to pay for a reshoot. And unless you’re Peter Jackson, that probably won’t ever happen.
When you’re a professional filmmaker, not doing it right the first time means you’re losing money. Sure, mistakes happen, lines are forgotten, nothing is ever going to be perfect, but when you’re a cameraman knowing how to properly expose your camera to get the best possible image is paramount.
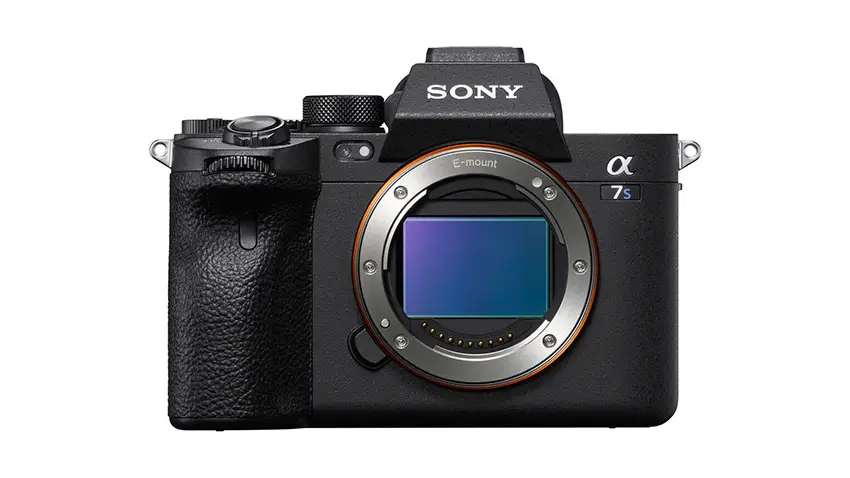
The Sony A7S III is a terrific, low-cost, dynamite low-light powerhouse, but when you’re not shooting with it in raw, taking the time to get your color and exposure set properly the first time is of the utmost importance (even in 10-bit).
Thankfully, wolfcrow has put together an in-depth guide on how to get-it-done-right when filming in S-Log3 on the new Sony A7S III.
Filming in Log
Understanding the importance of shooting in Log is the first step in understanding how to properly use your Sony A7S III.
Log is a method of compressing the colors and dynamic range of the image into a signal that retains the most information for professional color grading in post. Simply put, if you’re not filming in log, you’re throwing away almost half of the details in your images and there is no way to get them back.
Check out this great article we posted a little while back with Gerald Undone that dives a little deeper into what log is and how to work with it in DaVinci Resolve: Common Log Grading Mistakes and How to Avoid Them
The Best Settings for the Sony A7S III
I believe in getting right to the meat of it, and not dragging you along until the end; so without further ado, these are the settings you should use.
- Codec: XAVC S-I 4K
- Picture Profile Gamma: S-Log3 (PP8)
- Color Space: S-Gamut3.Cine (PP8)
- Don’t change any other settings
Shooting in XAVC S-I will give you the highest quality; and, personally speaking, I only ever shoot with my cameras at the absolute highest quality settings no matter what.
The Sony A7S III has two different Log profiles to choose from: S-Log2 and S-Log3. S-Log2 is good, but S-Log3 is less contrasty and easier to grade. It is the best choice for shooting in 10-bit, but if you are shooting with an 8-bit codec it should be avoided as it will cause issues with banding and compression artifacts.
Exposing for S-Log3 on the A7S III

Image Credit: Sony
If you want to do-it-right when you’re exposing your camera, you HAVE to use a grey card, period. Sony recommends that middle grey should fall at 40 IRE on your exposure chart. This is very easy to do with the A7S III.
The A7S III has a focus spot function that meters a focus point. Simply by touching the rear touch screen you can see if your image if exposed properly; if your middle grey card reads as a zero, you’re all set.
Skintones
The skintones of the subjects in your footage should never exceed 80 IRE and making sure you keep your values of the subjects in range with the custom zebra functions is easy. Simply set your custom zebra functions to IRE range you desire for the subjects skin, and once their face is fully lite up with zebra stripes, you’re there.
Lows
Never allow the black portion of the middle to fall below 10 IRE; below 10 IRE you will no longer be able to recover the darkest parts of the image and it will always look bad when shooting in Rec709. In Slog-3, below 10 IRE won’t ruin the image but it will be much harder to grade and you might not ever be able to make it look good.
Below 10 IRE you’ll also lose texture and details, and the compression will be much more noticeable.
Highs
The Sony A7S III clips at 94 IRE and there is no way to recover the highlights when they are blown out.
If your exposure peaks above 94 IRE, everything above that will be white and all that detail will be lost – but some overexposure is good because it helps the images look more natural, and subtle highlight blooms are a part of professional cinematography.
Overexpsure
You should overexpose the camera by half a stop to 1 full stop.
When you expose to the left of the histogram without clipped, and then correct for it in post, you’re pushing the inherent camera noise into the darks and getting the cleanest image possible.
However, you should keep in mind that when shooting in S-log3, additional corrections will be required in post to even out your exposure. *This is explained in the Gerald Undone video linked above.
Native ISO
The native ISO of the Sony A7S III is 640 for maximum range and color fidelity. For professional work, the maximum recommended ISO is 25,000 but for best image quality, stay between ISO 640 and 6400.
Conclusion
Shooting in log without monitoring with a corrective LUT as a reference is a recipe for disaster.
Taking the time to evaluate your exposure with a chart and relying on your histogram to set the proper skin tones is the only way you’re going to get the most out of your camera and avoid nasty color grading headaches in post.
I would further recommend using an X-Rite color checker chart to ensure you are correctly balanced. One of the bigger mistakes I see with new DPs is an improperly set color balance, which makes matching their work with other cameras nearly impossible and having to fix someone else’s work in post can be a real headache on a deadline.
It might be a boring nuance, you might have to make everyone weigh while you get everything set, but at the end of the day you’re thinking ahead and the results will make what you shoot look great. And to your clients, you’ll look like a million bucks.
[source: wolfcrow]
Disclaimer: As an Amazon Associate partner and participant in B&H and Adorama Affiliate programmes, we earn a small comission from each purchase made through the affiliate links listed above at no additional cost to you.


