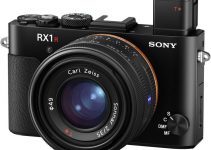
I think it is safe to say that the Sony a7S III is the current hot product for videographers today. They just started shipping in limited quantity and with more and more shipping out over time plenty of filmmakers have been getting their hands on them and finding out the best settings to use for beautiful footage.
One of the lucky filmmakers is Peter Lindgren who has put together a great video covering the settings he uses on the a7S III. Having been using the a7 III for a couple of years already and optimizing those settings over time he had a good base to start with. Plus he goes into the memory card situation a bit.
Lindgren kicks things off with his memory card choices. He starts with saying he uses CFexpress Type A. Obviously it’s the only way to get access to all the options available to you in the a7S III’s menu.
Every frame rate in every mode is perfectly fine. They are expensive though. With only the Sony CEA-G TOUGH series available in 80GB and 160GB for $200 and $400, respectively, you will be paying a lot.
A solution is to stick with familiar SD cards. Lindgren’s choice are the Lexar Professional 2000x UHS-II SD Cards. Being V90 they will support a vast majority of the a7S III’s shooting modes with ease. And you get 128GB of storage for $150. You only lose the 4K 120 fps in XAVC S-I.
Next up is using the Custom Modes on the dial. There are three available and it makes moving between settings super quick. The first position Lindgren uses for 25p at 1/50 second with the Picture Profile off.
This is his quick shooting setting for vlogs or just everyday capture. No grading required. This is saved as XAVC S in 8-bit 4:2:0 to keep it lightweight and compatible. Considering the upgraded color science of the a7S III the no Picture Profile option looks very good.
For the second custom setting he has his 50p setting. This is a high-quality setting with 4K XAVC S-I in 10-bit 4:2:2.
It also has Active SteadyShot on for super smooth capture. Then he does use the S-Log3 picture profile with S-Gamut3.cine. It’s great.
Three is 100 fps XAVC S 4K 10-bit 4:2:2. No Intra here so that it works with regular SD cards. Intra is preferred because Final Cut and other NLEs can handle that type of compression a lot easier than Long GOP options.
Moving on to all the custom buttons. Lindgren starts with the C3 button on the top left and set it to AF/MF Selector Toggle. This is a quick switch between auto and manual focus and is very helpful for lenses without a toggle on the side.
C1 is then set to White Balance for quick access during shooting. C2 up on top is the ISO button. The reason being that when shooting selfies you can quickly hit it and then use the screen to control instead of leaving it on the rear dial. And finally, C4 is for Picture Profiles.
Another customizable button is AF-ON. This he has set to Gamma Display Assist. It is helpful to be able to turn it on and off at will so you can double check exposure and yet still have quick access to a nicer version.
Finally, one very nice hidden feature on the a7S III is a recording indicator that shows a bright red outline on the screen. Sony didn’t have this on earlier mirrorless cameras. To turn it on you’ll need to head to the red Shooting menu and scroll down to the Shooting Display option and then the “Emph disp dur REC” setting. It’s super nice to have the confidence you definitely hit record.
This looks like a great start to setting up your a7S III. Anyone here have their own thoughts on how to best set up the camera?
[source: Peter Lindgren]
Order Links:
- Sony Alpha a7S III Mirrorless Camera (B&H, Amazon)
- Sony 80GB CFexpress Type A TOUGH Memory Card (B&H, Amazon)
- Sony 160GB CFexpress Type A TOUGH Memory Card (B&H, Amazon)
- Lexar Professional 128GB UHS-II SD Memory Card (B&H, Amazon)
Disclaimer: As an Amazon Associate partner and participant in B&H and Adorama Affiliate programmes, we earn a small comission from each purchase made through the affiliate links listed above at no additional cost to you.


