There is one word that seems to evoke the same scenario in the mind of almost all filmmakers around the world. The word is “Inception“. Our mind runs to the corridor scene, where the whole room starts spinning around, and to the backstage pics that showed the absurd work that went behind that shot.
As soon as we realized that the stabilization systems we used daily could achieve something similar, the inception shot was born. Now, Josh from Momentum Productions is going to show us a creative way to implement the famous shot in your productions.
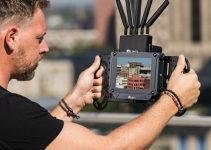
First things first. How do we get this mode? It’s a fairly new addition to the Zhiyun Crane 2 Josh is using, but it can be found on almost any gimbal at this point. On the Crane you just tap twice on the mode button, once in POV mode, another double tap will bring a big V on the monitor.
Now, hold tight to your gimbal with both hands. It will take a while to master this shot, so take your time to get fluent with it. Change lenses and try different focal lengths to find your preferred style.
One of the reasons the original shot worked so well, aside from the whole structure of the film being amazing, was that we had a visual limit brought by the walls of the room. The moment the room started rotating we could see the whole setting around the actors move, conveying more energy because of the wall impending upon them.
That’s not to say that we should shoot only in corridors and hallways, but having some elements in the shot that can give a visual frame, a guide to the eye, will help. In this case, Josh chose a pathway with a wall on one side and a fence on the other.
Furthermore, speed is the key. If you have noticed the more striking shots taken in this way are not hectic neither fast. Keeping a slow pace, a slow and constant movement will convey the maximum energy to the shot.
If you hold a small pressure on the button and slowly move your finger right (or left) you’ll have the best results.
Now it’s time to spice up the things. Keeping the shot going, move forward and tilt the arm of the gimbal downwards or upwards.
The gimbal will continue its movement, but you’ll be skewing the frame giving this absurd perspective shift. But we said this could become a transition, right?
Well, the use as a transition is fairly simple: using speed ramping on the clips will create a sudden ramp on the end of the first clip, slowing down at the beginning of the second clip.
Easier done than said! Give it a try in your NLE of choice, but remember to finish up with some motion blur, and to line up the two clips not perfectly at the same angle, but offsetting the second one to make a seamless transition.
So, there you go, a great and simple transition that can add a lot of production value to your shots, easy and quick to replicate. If you feel that your footage is still not good enough, don’t worry: practice makes perfect!
[source: Momentum Production]
Disclaimer: As an Amazon Associate partner and participant in B&H and Adorama Affiliate programmes, we earn a small comission from each purchase made through the affiliate links listed above at no additional cost to you.


