As I have mentioned before in a prior post, recently I was a 2nd AC (among other things) on a low-budget indie feature film, which just wrapped days ago. One of the key pieces of kit we had on set was the Teradek Bolt 500 LT, which gave us an opportunity to give the director and focus puller a wireless live video signal from my Canon C300 Mark II, which we used to shoot the film.
In this post, I will do my best to give you an accurate summary of my experience with the Teradek Bolt 500 LT in a short and to the point hands-on review. But first, some background on the film and its style and how it influenced our decision to go with the Teradek system.
We shot the film in 3 weeks in a small town in Southwest Bulgaria; before we commenced principal photography, we had a week and a half of pre-production. This included location scouting and a couple of days where we tested the camera by rehearsing some of the more challenging movements that some scenes would require – i.e. some long takes of filming in a car, then getting out of the car and following the main actor for a while.
UPDATE: Check out the trailer for Danny. Legend. God below:
For more behind the scenes updates be sure to like the film’s Facebook page and follow on Instagram too.
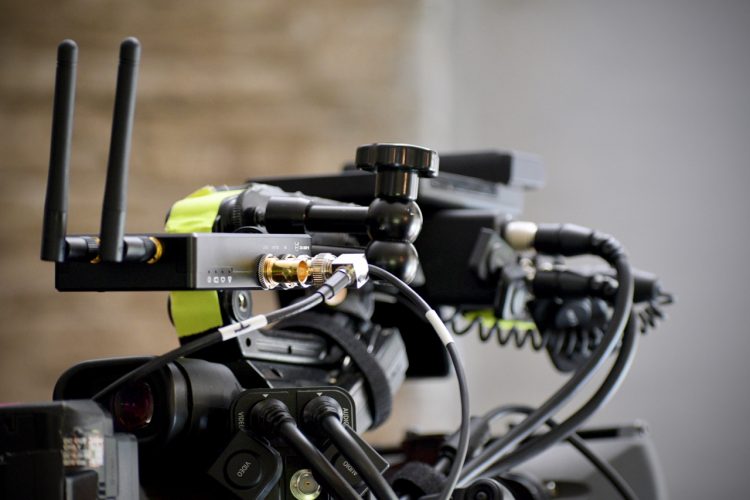
Image by Vladislav Chanev – behind the scenes/on-set photographer
The director was a good friend of mine, and this was to be his first feature film. We had worked before on a couple of shorts films and had numerous discussions prior to starting principal photography as to how he wanted the film to look and feel. He wanted a more documentary approach/cinema verite approach, which meant every shot would be handheld.
Naturally, as far as camera choice – all three of us (me, the director, and the DP) quickly leaned towards the Canon C300 Mark II; after all it was not only a camera that I already owned, which meant we would be saving money on a camera rental, but it was also on the “approved for Netflix” list and had a proven track record of high-end documentary filming.
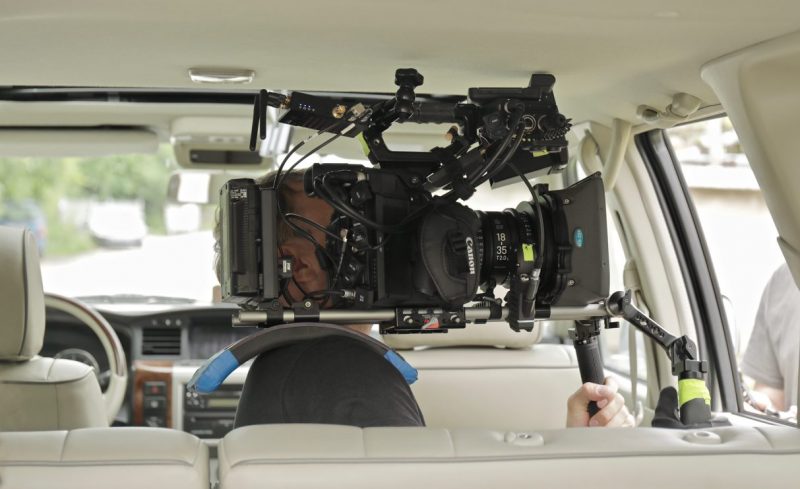
The film was shot in 4K (4096 x 2169) DCI in 24fps using Canon Log 3/Cinema Gamut in the internal 10bit 422 XF-AVC codec onto Sandisk Extreme CFast 2.0 cards.
I set up the camera to output 1080p/24 via the MON SDI output (with a monitoring LUT) to the SmallHD FOCUS Bolt RX monitor that our focus puller used and the director’s monitor, which was basically our video village comprised of a Blackmagic Design Video Assist 4K, which received the signal from the camera via the Teradek Bolt 500 LT receiver mounted on top all encased in a Wooden Camera Directors Monitor cage.
Due to the handheld/documentary style of filming, we knew we would have really long takes – some exceeding 7-8 minutes, which meant that the camera would be moving fast and we needed to have a reliable way of transmitting the video signal to the director’s monitor and the 1st AC monitor.
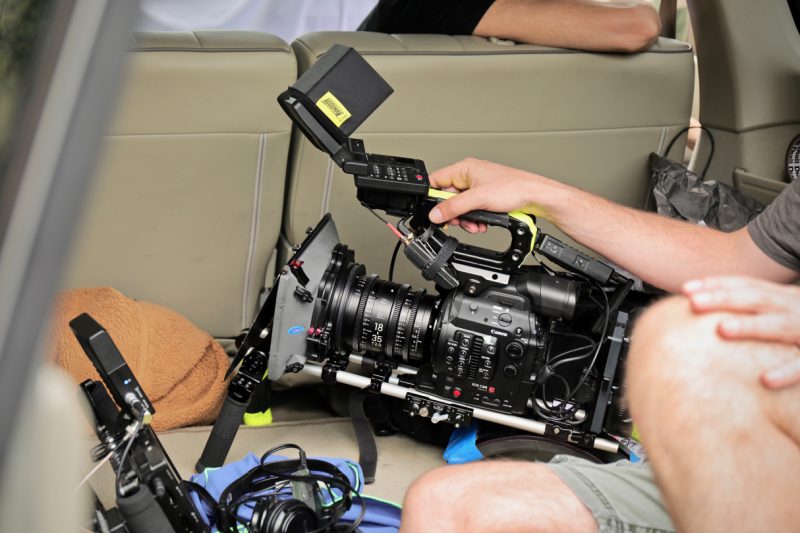
Hence why we chose to go with the Teradek Bolt 500 LT – it had both a compact transmitter, which allowed us to rig it in various configurations on the C300 II to accomodate getting in and out of cars without the antennas or transmitter getting caught in the doors or side of the car, and a decent 500 feet range for a stable video feed.
The Teradek Bolt 500 LT is the more budget-friendly version of the Bolt 500 XT (minus the manual frequency selection and 5Ghz spectrum analyzer among other things), that ticked all the boxes for us – a 3G-SDI output, compact and lightweight form factor, low power consumption, and the transmission range that we needed.
Months before we head out to Eastern Europe to shoot, we considered other budget wireless options from other companies, but at the end of the day, I didn’t want to risk it and settled on what is essentially the industry standard kit for on-set wireless video transmission – Teradek.
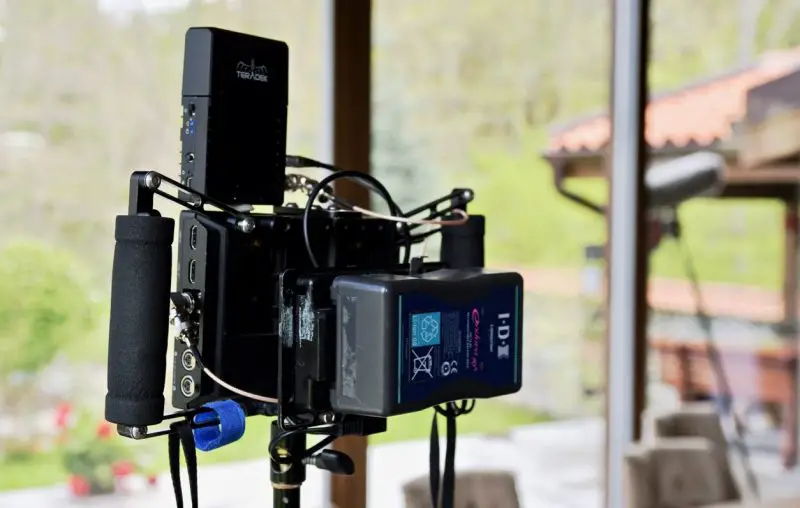
Teradek Bolt 500 LT RX with Blackmagic Video Assist 4K in a Wooden Camera cage
Teradek Bolt 500 LT 3G-SDI Wireless Features
- Transmits up to 500 feet (150 meters) Line of Sight
- Supports up to 1080p/60 Resolution
- Backwards Compatible with Select Systems
- Compatible with:
- Sidekick II and 703 Bolt universal receivers
- Bolt 500 XT
- SmallHD FOCUS Bolt RX monitor
- 3G-SDI Input and Output
- Zero Delay
- Dual, Adjustable Antennas
- 2.4 & 5.8 GHz Noise Rejection
- AES 128bit Signal Encryption
- Transmits to up to 4 Receivers
- Price: $1791 at B&H
Setup, TX and RX Pairing
I am not a 2nd AC by trade, not by a stretch. And even though I’ve done the job on a couple of music videos and short films, this was my first feature film as a 2nd AC. With 20+ crew each day, a very experienced 1st AD, an experienced DP and a veteran Production Manager, plus one of the most recognisable young actors from the biggest TV drama in the country in front of the camera, this production was legit and the biggest one I’ve ever been on.
Naturally, I was nervous as hell on DAY 1, and just wanted to make sure I didn’t f*ck up – my main goal was for all the kit I was responsible to work as it should and to help my DP with the camera rig and also rigging some lights.
Thankfully, in the few days of pre-pro we had, I tested the Teradek kit to make sure I knew what I was doing on set. Mind you, this was the first time I had used this specific Teradek kit – prior to this shoot a couple of years back, I had used a Paralinx Arrow, I believe it was called – an HDMI transmitter/receiver set, which worked like a charm with the Sony A7s I had for a short time, some time ago.
Needless to say, mounting the receiver, transmitter, setup and pairing both was a straightforward process even I could do without reading any instructions. I opted to mount the Teradek transmitter via a short universal magic arm to one of the side 1/4 20″ threaded holes on the side of the Canon C300 mark II top handle, on the AC side (right side of camera) so this way I can have quick access to adjust the transmitter sideways when the DP (who also operated the camera) was going in and out of cars. The transmitter has a 1/4 20″ hole on the bottom as well as a couple of M3 mounting points, so mounting options are abundant and can be tailored to your specific needs.
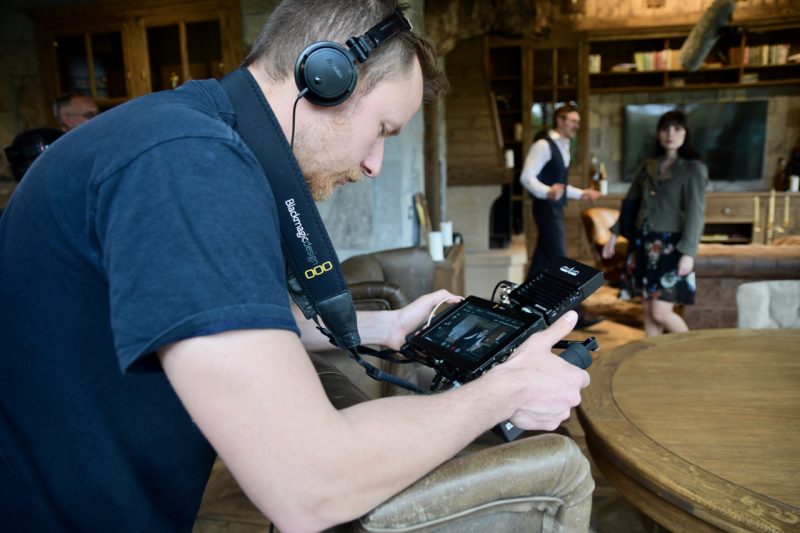
The Bolt 500 LT receiver was mounted on the top of the Wooden Camera cage and connected via 3G-SDI cable to Blackmagic Video Assist 7-inch monitor, which was our director’s monitor. The cool thing about the Teradek Bolt 500 LT system is that it can transmit to a total of 4 receivers at a time.
Since we already used the LT RX on the director’s monitor, the focus puller used the SmallHD FOCUS Bolt RX, which has its own Teradek receiver built-in, which was super nice as it saved me running another cable from the RX to the monitor and also powering the RX separately. The SmallHD FOCUS BOLT RX is all one unit, so you just pop-in a Sony NP-F style battery on the back, pair the receiver and you are good to go.
Having a single transmitter and getting signal to 2 separate monitors wirelessly was a huge plus.
And speaking of pairing – that’s really easy too. Even for someone like me, who is new to using a Teradek system. The interface on the transmitter is really simple; you get 4 indicator LEDs, a 3G-SDI input, a 3G-SDI output and a 2-pin LEMO-style power connector on one side, and an ON/OFF switch, a reset switch, as well as a USB port on the opposite side.
Pairing the Teradek Bolt 500 LT RX and TX was simple and it requires the following steps.
- Mount the TX on the side of the camera
- Run the included D-tap to Lemo power cable and get power from the HawkWoods V-mount battery bracket
- Connect the MON SDI output of the camera to the 3G-SDI input of the TX
- Mount the RX on the side, back or above the monitor/cage – but be sure not to obstruct the antennas and to keep them and always the receiver mounted vertically
- Connect the RX to a monitor with a 3G-SDI input via the supplied SDI cable
- Access the RX menu via the side joystick
- Select the appropriate geographical region – EUROPE, US, etc.
- Go to the Pairing menu and initiate the TX/RX pairing process.
- On the TX use a paper clip to gently press the Reset button for 2 seconds, which makes the TX discoverable by the RX
- You’ll see the LINK LED blink and then go solid blue, which means you have transmission
If you also want to also PAIR with a SmallHD FOCUS BOLT or equivalent monitor with a built in RX, then:
- From the touchscreen – swipe from left to right to access the Settings
- Go to INPUT menu – select Wireless mode (this will automatically un-tick HDMI)
- Select appropriate region where you are based
- On the TX use a paper clip to gently press the recessed Reset button for 2 seconds, which makes the TX discoverable by the RX
- Go to PAIR menu and it finds the TX, select PAIR
- After a few seconds (10-30 seconds) you will get a pairing confirmation
- Ensure the LINK status LED on the TX is solid and verify that the feed is coming on the SmallHD FOCUS Bolt monitor
Important note about pairing Bolt 500 LT TX, RX and SmallHD Focus BOLT – make sure you have access to a 3G SDI monitor and use the same regional settings – US, EUROPE etc. across all devices!
I wanted to see if I can initially pair the SmallHD FOCUS BOLT, which has a built in RX, with the BOLT 500 LT TX without connecting the RX to a separate 3G-SDI monitor.
When I selected the EUROPE region in the FOCUS BOLT menu, I couldn’t get it to pair with the TX. This was because the Bolt 500 LT TX and RX were previously set to the US region. This is important for regulated 5GHz frequencies, and unless all three devices – the Bolt 500 LT TX, the RX and the SmallHD FOCUS BOLT were all set to the same region – no pairing was happening. Makes sense, but when you don’t have a 3G-SDI monitor to check the region of the Bolt 500 LT TX/RX, you won’t know what region your TX/RX are on.
Soon I found out, that I need to have an SDI capable monitor to access the menu on the separate RX but in those days before before prep, we had not picked-up yet our Director’s Monitor (a 7-inch Blackmagic Video Assist 4K) from a local rental house, which made pairing the TX a bit of a challenge; I only had a small, off brand HDMI 5-inch on camera monitor with me, which was not going to work with this setup.
Once we got our SDI monitor, all was fine – I got into the RX menu, changed the regional settings to EUROPE, and then using the PAIR menu via the joystick on the side of the RX, paired the TX and the RX. Then, all I had to do was also pair the SmallHD Focus BOLT, which was a breeze thanks to its intuitive touch screen menu, which you can see in the video review above. (Funny thing was that it also worked when I set all devices to a US region, but then flipped it to the compliant European region, since I wanted to be compliant and to make sure I didn’t run into any frequencies issues on set).
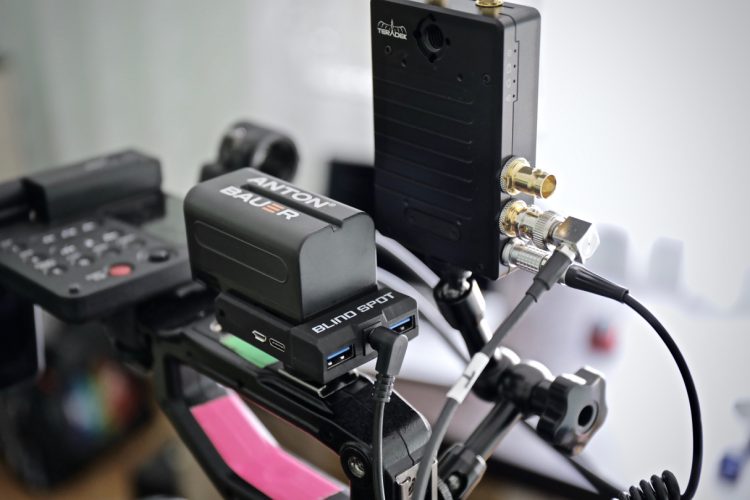
Blind Spot Gear’s Power Junkie supplying juice to the Bolt 500 LT TX
Power Options
The Bolt 500 LT comes with a 2-pin LEMO to D-Tap power cable and its own 3G-SDI cable to get the feed from the camera.
We used a Hawk-woods V-mount battery plate with a total of 5x D-tap outputs for powering accessories, which came in really handy. One of D-Tap outputs was mounted on the top of the plate, and 4x on the back of the plate – one went to power the camera, the 2nd output to the Teradek Bolt 500 LT transmitter via the supplied cable, and we also used a 3rd D-tap to power the Teradek RT brain, which drove the lens motor (I will post a separate review of the Teradek RT in the upcoming days).
Regardless of the camera you are using, whether an ARRI, RED, Panasonic, Sony, Canon, or Blackmagic Design, the Teradek Bolt 500 LT is super easy to power – as long as you have a D-tap output either from the battery itself – my CoreSWX PowerBase EDGE has a couple of D-taps out, or from the V-mount or Gold mount distributor plate, you can supply juice to the Bolt 500 LT transmitter.
One alternative way to power the Teradek Bolt 500 LT transmitter (as was my backup plan, in case the V-lock plate or any of the V-mount batteries with built-in D-tap outputs all of a sudden went kaput) was to use a special D-Tap to DC Barrel connector cable I ordered from a third party cable specialist online and get power from the Blind Spot Power Junkie, which uses Sony NP-F batteries. The Power Junkie is nifty little battery adapter that you can use to power compact accessories, your mirrorless camera, action camera, and/or a smartphone.
All in all, power was never an issue – the transmitter takes anywhere from 6.8V to 17Volts and due to its low power consumption, I’d never even noticed it in a 12 hour shooting day. I have not measured exact consumption, but as far as I can recall, we had a total of 4x IDX DUO C98 lightweight V-mount batteries (98Wh) and we rarely used more than 3 in any given day to power the camera rig and all its accessories – the Teradek RT lens motors, brain, and Bolt 500 LT wireless video transmitter.
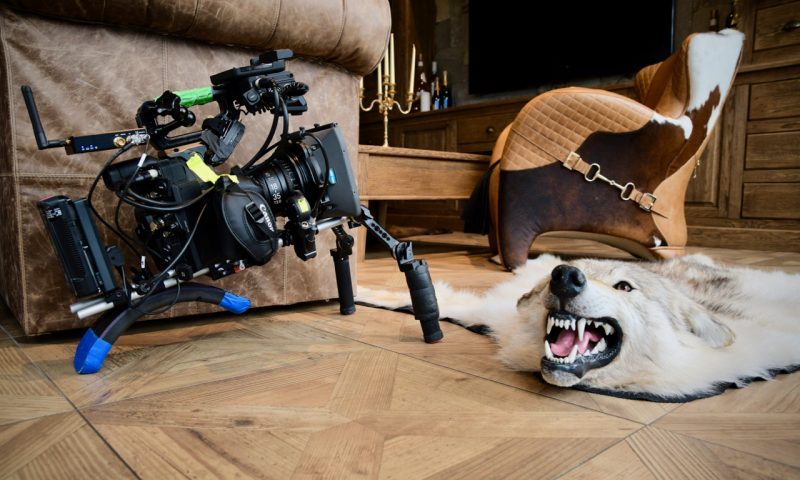
Range & Wireless Signal
The Teradek Bolt 500 LT is rated at 500 feet line of sight. In my opinion, and experience so far with the unit, this is a decent range for a low-budget feature, short film, music video, and or commercial. Unless you are doing some crazy stunts, explosions or the shoot requires complicated action scenes, where the 1st AC, director, client, and all vital personnel need to be as far away from the scene as possible, then you need to opt out fo the 1000 feet and the 3000 feet versions, but for most productions running on a budget 500 feet will do.
In my case, we had a few scenes where the camera follows the main character goes into a live club (with carefully planted extras, and actual club goers during normal working club hours, i.e. 2am in the morning) climbs to a VIP section through a narrow staircase, all while the music is blasting and our minimalist crew of the DP (who was also operating), was navigating a sea of not-so-sober club patrons.
Naturally, we had the video village and our 1st AC nested in a small (lounge-like) area near to the entrance of the club (where it was the safest, and the chance of someone bumping into our strategically placed C-stand, all in all minimal). And while I don’t have permission to show you footage of this scene – as simple as it sounds on paper – a guy walks through a crowd and then goes up some stairs – this scene was really hard to execute.
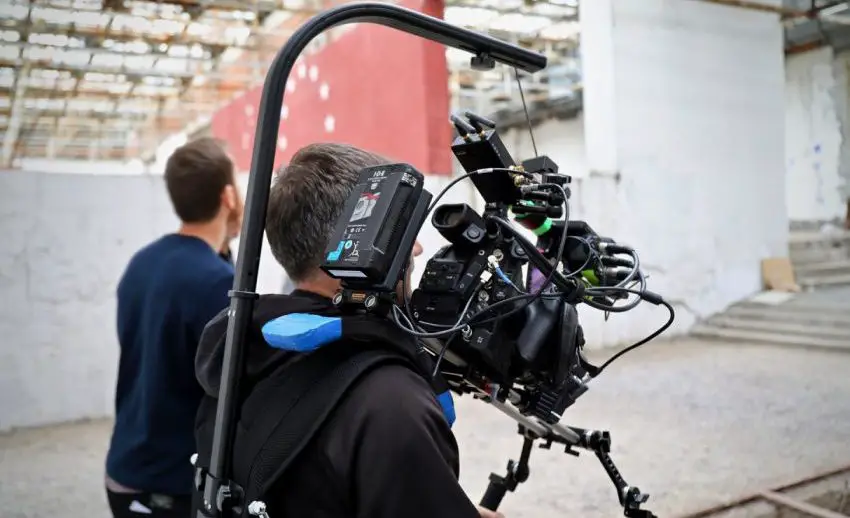
This was one of the few instances where we had the signal cut in and out to the Teradek receiver – understandably, even though we were in range (we were about 60-70 meters), the camera was following the main character, which meant the signal had to travel through a few walls and was intermittent. The solution was to take the director’s monitor off the C-stand and use the supplied SmallHD neck strap, and have the director handhold the cage and monitor, which he did most of the time anyway, and also position him near the main club room entrance – this way he had line of sight for the majority of the shot. Once we did that, no problems.
One other instance, where we had to arrange our directors monitor and position our focus puller closer to the action was were we shot in a small flat, where the blocking of the scene required the 1st AC to be outside in the hallway of the building entrance, which cause a signal drop (understandably, since the signal had to travel through 3-4 thick concrete walls). As long as we had somewhat of a line of sight, the Teradek was bulletproof.
As I said before, range was never an issue, and neither was signal loss. Anytime we shot interiors and also a crowded club (where we filmed a few times) I dreaded the possibility of losing signal to the directors monitor and even worse – the the SmallHD Focus Bolt our focus puller was using, but alas, apart from the odd VHS-like “tracking” artefacts, and the aforementioned tricky walk-and-follow club scene, shooting interiors was never a problem.
To my pleasant surprise, even in cars it held up in traffic following a car from a distance (the director being in the vehicle following the car in which the action happens).
Summary
In a short summary, without repeating myself too much – the Teradek Bolt 500 LT was a tank! It worked everyday, and it never lost signal, unless we were in a situation where a line of sight was impossible, or we exceeded its range, which was very rare. At over 100 meters, the range is enough for the type of production I was on – a low budget feature film.
It’s not too “hungry” and even though it gets fairly hot, it was very reliable even on long 12+ hours days sometimes for over three weeks. As long as you have line of sight between the TX and RX, and you are within range – you’re good.
I guess there is a reason why you see Teradek’s on pretty much ever set that needs to send a signal wirelessly these days.
If there were some cons, or rather limitations – they’d be that I wished there was some sort of a tiny LED screen on the side of the RX so that you can enter the pairing and regional menu without the need for a SDI monitor when you are also transmitting to a SmallHD Focus BOLT for as well.
However, this is the budget LT line that is meant to provide a no-frills reliable wireless signal without the “bells and whistles” of the higher tiered Teradek’s in order to keep the cost low.
A bit more compact RX would also be helpful and maybe an additional 1/4 20 mounting point on the side of the receiver would be nice, but at this point I am just nitpicking.
If I could summarize my experience in a sentence – it would be sound something like this: I now know why the Teradek wireless systems are an industry standard. Now I just have to start saving to get myself a set, since the review sample went back to Teradek.
Huge thanks to Teradek for letting me review their awesome Bolt 500 LT 3G-SDI wireless TX/RX system.
Be sure to explore the Teradek Bolt 500 LT, XT and the rest of the Teradek Bolt family over on their official website here. For those of you interested in picking up a Bolt 500 LT wireless system for your next production, do use the affiliate links below.
Order links:
- Teradek Bolt 500 LT 3G-SDI – $1,791 at B&H
- Teradek Bolt 500 LT HDMI – $1,341 at B&H
Disclaimer: As an Amazon Associate partner and participant in B&H and Adorama Affiliate programmes, we earn a small comission from each purchase made through the affiliate links listed above at no additional cost to you.


