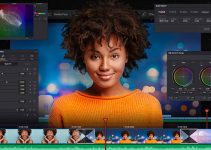
Davinci Resolve has always been an industry standard in the post-production realm, but since the acquisition from Blackmagic Design and the consequent huge price cut, it has been massively adopted by filmmakers around the world. In fact not only we have now a free version, but the studio version is only $299 in a one-time purchase, and as an added bonus a key comes with every camera from the company.
The software is famous for being one of the best color grading suites in the world, but sometimes you may be on a rush and all you need is a fast and usable grade on multiple clips, maybe just to show a client what mood you’re trying to create. So here is a quick tip for a simple grading from Casey Faris.
Opening up resolve, we have different clips with different exposures, but all from the same camera, in this case, a DJI Mavic 2. This is the best scenario to apply this kind of batch correction, but it could work also with different cameras, although it may need a little bit more work.
Starting from the first shot you choose, we go with a basic grade. That would be applying a conversion LUT for your camera. In the video, Casey showcases a few free LUTs for a bunch of different cameras. It may be worth to take a look as the list is quite comprehensive. This will give you a good start to begin with.
Now add a serial node before using the shortcut Shift-S. We shall call this our “Tweak Node”. Now you can apply a few adjustments to this node. In this case, Casey is working on gamma and blacks, but keep in mind that based on the image you’re starting with, and most of all what has to be the final result, you will need to make different adjustments.
So, once you’ve made your adjustments, in the color tab you can shift-select the clips you want to apply the correction to, and then middle-click with the mouse (or the wheel on some mice) and Resolve will apply the grade to all the other clips you have selected.
There you go, if your clips came from the same camera now you have them all more or less in the same ballpark, what is left is to go to the “tweak node” for those that seem a little bit off balance and correct them, but if instead, the lighting situations are similar you’re probably ready to go just like that!
[source: Casey Faris]
Disclaimer: As an Amazon Associate partner and participant in B&H and Adorama Affiliate programmes, we earn a small comission from each purchase made through the affiliate links listed above at no additional cost to you.


