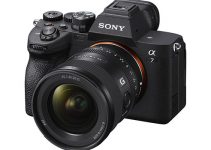
Have you ever filmed for a long period of time continuously without cutting, maybe for a guest speaker at a conference or event, and used a separate device to record audio only to have syncing issues in post because one of the recorded audio tracks is a slightly different speed from the other?
If not, congratulations you are one of the lucky ones. For us who have experienced this terrible tragedy, known as audio sync drift, it can be a nightmare scenario that has you questioning your profession as a filmmaker. Even a slight speed inconsistency, stretched over a long duration, will cause a severe syncing issue.
But fear not, because video editor Gerald Undone has created a video addressing this very issue and walks through a relatively simple solution using Adobe Premiere and Audition.
Thankfully in the past few years, Adobe has made great strides in improving the integration of using Audition with Premiere and vise versa. Gerald Undon‘s tutorial does a great job of illustrating how simple it is to round trip an audio track from Premiere into Audition for editing (in this case fixing audio sync drift issues) and importing the file back to the original Premiere timeline.
The tutorial assumes the “clean” audio was recorded straight into Audition from an external microphone, while the camera was used to record scratch audio for syncing in post. If your audio was recorded on a device other than straight into Audition, such as a Tascam or Zoom recorder, import your audio file into Adobe Audition and create a new project.
In Premiere, after importing the footage and creating a sequence, right click on the cameras scratch track audio and select Edit clip in Adobe Audition. This will open the audio file in the Audition project you created with the audio from your external device.
Next, in the top left-hand corner of the Audition workspace, click the Multitrack button. This will reveal the clean audio track along with additional empty audio tracks beneath it.
Grab your scratch audio track from the project bin and drag it to the empty audio track beneath the clean audio in order to use it as a comparison for syncing. Manually sync the beginning of the clip by using the audio waveforms.
The example in the video uses claps in the waveform to identify sync points, but you can use any identifying, preferably loud, noise as a syncing point at the beginning of the track. It’s generally good practice to always clap or use a slate when recording audio to an external source.
As you zoom out from the timeline, you will see where the audio sync starts to drift. Navigate to the end of the clean, externally recorded audio and grab the top right that shows the Stretch Tool. While holding the mouse down and using the waveforms as a guide, move the track left and right to adjust the speed of the clip until it is in sync with the scratch audio track beneath it.
Next, you will start preparing to hop back into Premiere with the newly retimed clean audio. To do this, mute the scratch audio. It is important to mute the track and not delete it, as you will need to use the entire Audition session and preserve the positioning of the clean audio track.
Click on the Multitrack tab, then Mixdown Session to New File, then select Entire Session.
Now choose File then Export File and save as your desired file type.
Back in Premiere, import the new file from Audition and drag it onto your timeline beneath your camera’s original scratch audio.
And there you go! Everything should sync up flawlessly at this point. You can stop browsing the job boards and take your camera equipment off of eBay because your project has been saved and you are fully equipped and prepared for the next time you encounter the dreaded audio sync drift.
[source: Gerald Undone]
Disclaimer: As an Amazon Associate partner and participant in B&H and Adorama Affiliate programmes, we earn a small comission from each purchase made through the affiliate links listed above at no additional cost to you.


