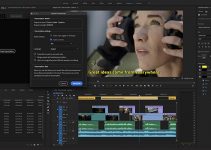
Of all the color profiles included with Sony mirrorless cameras, S-Log 2 and S-Log 3 are arguably two of the most frequently used gamma curves by aspiring filmmakers and seasoned professionals alike.
While the dynamic range and color flexibility has helped bolster the flat profiles’ reputation for use in video, it can be quite tricky to get the most out of these presets in practice. This is especially true when it comes to utilizing S-Log flavors while trying to get natural-looking skin tones.
So, how to properly expose S-Log in this particular situation anyway? Harv of Harv Video/Audio Stuff has a few handy ideas in mind as he explains his setup process regarding the topic in the video below.
To start off, you’ll need to make sure that your lighting is set up correctly. Then, you’ll have to set your camera to the Cine2 Profile while dialing in ISO 400 which is the linear equivalent setting of the S-Log2’s native ISO of 1600. Using this profile at the beginning will help you plan the lighting of your shot while utilizing a preset that’s not as flat as S-Log.
For this particular setup, Harv lit his talent using two light sources – a large diffused source of light which acted as a key for the subject, whereas the harsher spotlight was used in the back. In addition, some orange-tinted Christmas lights were kept in the background to add a little out-of-focus bokeh and spice up the shot.
As you set up your lighting scheme, you’ll also need to pay close attention to your waveform monitor and white balance setting. As a rule, try to adjust the intensity of the lights hitting the subject so that you can bring the skin tones in the 40-50 percent range. In addition, use a gray card to manually adjust your white balance setting. Utilizing the auto white balance feature in the camera is not recommended.
After your camera settings and lighting setup is adjusted, you can switch your camera’s color profile to S-Log 2 and ISO 1600 respectively. Looking at the raw footage, you might notice that the colors appear flat regardless of the fact that your monitoring tools indicate you’ve nailed the perfect exposure already. At this stage, you can load the suggested LUT by Harv in your external monitor so that you can evaluate the image more accurately on the fly.
Once you capture the footage, bring the clips into Final Cut Pro X. The first step would be to use the Color Wheels and add a simple S-curve via the Color Curves tool, thus increasing the overall contrast of the image. Afterward, Harv recommends applying the Drive LUT from the Vellichor LUT pack.
Finally, you’ll need to reduce the LUT’s intensity to 50% and perform some corrections to the colors of the image. To achieve the desired effect, increase the saturation in the mid tones and push the shadows towards the blue color to cool the latter down.
Lastly, you can use the FCPEffect’s Skin Smoother plug-in to isolate and soften the skin tones as well as remove any blemishes or other small imperfections. As Harv explains, the workflow referring to S-Log3 is almost identical, except for the slightly different S-curve adjustment you need to apply to your image.
As you can see, S-Log can be a very powerful and flexible gamma profile to use but only when you know exactly what you’re doing. Kudos to Harv for sharing this insightful tutorial with the community.
[source: Harv Video/Audio Stuff]
Disclaimer: As an Amazon Associate partner and participant in B&H and Adorama Affiliate programmes, we earn a small comission from each purchase made through the affiliate links listed above at no additional cost to you.


