There is a considerable amount of cinematic video tests you can find online that use the GH5/GH5S cameras in multiple ways and give different recommendations in regards to how you can make the captured footage look more cinematic. Recently, I’ve come across a particular video produced by filmmaker Joonas Tahtinen who utilizes a bit different approach.
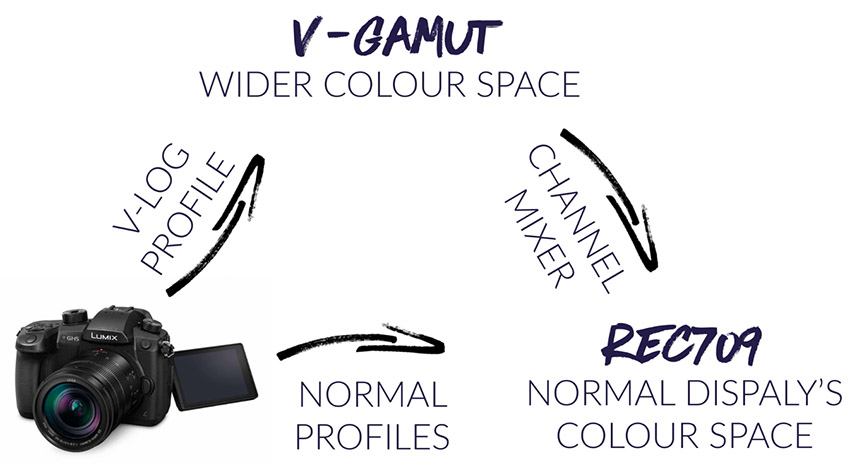
Instead of shooting predominantly in V-Log, his method of making the GH5’s footage more cinematic suggests filming with Hybrid Gamma profile and then changing the color space to V-Log in post. Yeah, I know, it doesn’t make a lot of sense in the first place, but once you see the results showcased in the video, you may quickly reconsider.
Even though Tahtinen prefers not to shoot in V-Log most of the time, it doesn’t mean that the proprietary profile should be entirely cast aside. V-Log is still able to hold more color data than any other picture profile in the camera.
That being said, the best solution to balancing flexibility with the overall look according to the filmmaker is to shoot in either D-Log or Hybrid Gamma first and then change the color space to V-Log directly in your NLE using the Channel Mixer. This method will also give you more flexibility when tweaking white balance and exposure of your image.

Apparently, the easiest way to convert the captured footage into Rec709 would be to use the free set of LUTs created by Joonas. The pack included in the download offers options for converting Hybrid Gamma footage to V-Log and D-Log to V-Log. To use any of these LUTs, you’ll have to import them into your editor of choice and pick the preset that corresponds to the picture profile you shot your footage with. From there, you can make all the necessary adjustments accordingly.
If you’re someone who’s still adamant about shooting in V-Log, there are some tips and tricks you can take away from the video as well. Firstly, before beginning the color grading process, you need to convert the color space of the footage to Rec. 709. To do so, import your footage into your video editor and apply the Channel Mixer (this is for Premiere Pro, locate the appropriate alternative in your editor). Then adjust the settings to the values as follows:
Afterward, add the RGB Curves filter to your clip and modify the curve to your liking. Again, an alternative method to this process would be to directly apply a LUT to your footage that’s specifically made to convert your clip from the V-Log colorspace to Rec. 709. If you don’t already have a LUT for this task, Tahtinen has already included one in his free LUT pack.
Either way, you should have better control over the captured images and eventually achieve the desired cinematic film look with your GH5/GH5S camera. In case you decided to give this workflow a try, please do share your results in the comments below.
[source: Joo.Works]
Order Links:
Disclaimer: As an Amazon Associate and a participant in other affiliate programs, we may earn a small comission from qualifying purchases made through some of the links on this page - at no additional cost to you.


His luts are really saturated so I think you need to decrease saturation. I also think it’s not a good idea to shoot something then convert to log. Don’t you introduce noise by pushpus ararou the image a lot?