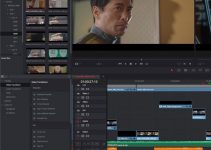
Even though it initially became widely-known as a professional color grading software, DaVinci Resolve has come a long way in the recent years with its constantly expanding feature set and quickly advancing range of capabilities.
Apparently, there is a fast-growing base of professional video editors and enthusiasts alike who are now starting to use the software more and more frequently, not just for color grading, but as a full-fledged non-linear video editor in place of already well-established applications such as Premiere Pro CC and Final Cut Pro X.
While video editing is a relatively new for the platform, there are many users out there who have already shared a ton of useful information regarding this particular functionality, including seasoned colorist and avid Resolve user Casey Faris who outlines his personal tips on faster video editing in DaVinci Resolve 14 in the video below.
Casey’s first piece of helpful advice is to edit in passes. Rather than just randomly making edits as you go, you could try to run through your entire timeline with one goal each time, and then repeat the action once you’re done. For instance, on your first pass, watch everything you have in the timeline and make your preliminary cuts (taking out your bloopers). On the second pass, start to work on the timing for each cut. Continue this process until you’re completely satisfied with your edit.
Secondly, organizing your workspace should be considered as another essential recommendation. Close any unneeded windows or tabs and move around all your editing controls until you find the best configuration for your editing style. For example, if you’re simultaneously working on adjusting effects as you edit, close all your windows except for the project timeline, preview monitor, and effects control panel.
In word processing, you know that it’s easier to use Control (or Command) and X, C, or V to cut, copy or paste rather than using your mouse to go to Edit > Cut, Copy or Paste respectively. The same can be applied to editing in Resolve 14. By memorizing most of the program’s editing shortcuts, you can save a ton of time while taking maximum advantage of your keyboard instead of trying to perform multiple actions by only using your mouse.
Sometimes you may find that when you’re using a tool such as Split Clip or Ripple Trim, all the layers in every track are affected. To avoid this, pay close attention to whether or not the Auto Select tool is enabled. You’ll find this tool on the left side of the timeline. What this feature does is that when enabled, it will allow the track to be affected by your trim editing tools meaning that if all tracks have Auto Select enabled, they all will be modified. To avoid this from happening, click on the Auto Select tool to enable/disable the tracks that you want to be included/excluded once the action takes place.
Furthermore, if you’re in a pinch or just want to do some fast color correction or grading to your edit without going in depth with the controls, an easy solution would be to use a LUT. Even though this workflow won’t be perfect, you’ll have a more watchable version of your footage that should make the editing process more convenient and straightforward. Plus, DaVinci Resolve 14 does come with some fantastic pre-installed LUTs that you can use on the fly.
Keep in mind that while these tips were made for users of DaVinci Resolve, they can be applied to almost all nonlinear video editors such as Adobe Premiere Pro and Final Cut Pro X. While the tools used to carry out the techniques may differ, the general idea remains the same – maximizing efficiency of your post-production workflow.
[source: Casey Faris]
Disclaimer: As an Amazon Associate partner and participant in B&H and Adorama Affiliate programmes, we earn a small comission from each purchase made through the affiliate links listed above at no additional cost to you.


