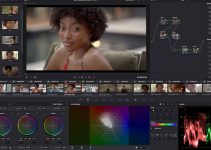
One of the most common techniques you can incorporate into your productions when shooting at higher frame rates is speed ramping. In essence, this method allows you to manipulate progressively the speed of different parts of your footage to bring attention to these particular moments or use it just for fun to spice up your music or action sports videos.
Most popular NLEs these days provide this powerful editing asset as a built-in function, so if you’re curious how can you pull this off particularly in DaVinci Resolve 12.5, the following tutorial produced by Theo of Miesnermedia has got you covered.
More or less, you can compare a speed ramp to a story as it also has a build-up, a climax, and then a resolution on its own. To get most out of each speed ramp, you should use the key action as your climax. But, how do you apply this technique in DaVinci Resolve? Well, once you have your clip in the timeline, right-click on it and go to Retime Curve. After the Retiming Editor appears under you clip, you’ll need to switch Retime Frame to Retime Speed in the drop down menu at the upper left-hand corner of the Curve Editor.
Then simply place the playhead on the frame where you want to start the speed ramp and create a keyframe. Repeat the same step but this time by selecting another frame as an ending point. Then, by dragging the middle segment between the two keyframes in either direction you can change the speed of your clip. You can control the speed by adjusting the percentage value until you get the desired effect.
You can also create further refinements to the speed transition points by selecting and adjusting the Bezier Curve tool. Once you have retimed your clip, you can change the way the platform is processing the material to improve its visual quality. Typically, it’s recommended to use this adjustment when you are slowing down clips that are shot at lower frame rates.
You can either use the project-wide setting available in the Project Master Settings or directly change the Retime Process under the Retime and Scaling section in the Inspector to Optical Flow just as shown below. Keep in mind, though, that you should probably render your clip first in case it can’t be played back smoothly in real-time when you’re using this method.
You can close the Speed Curve by clicking on the Curve button at the right-hand side of the clip’s title bar in the Timeline and continue with editing and color grading. Last but not least, always use speed ramps intentionally when they serve your story and enhance the narrative. Otherwise, you risk to overdo it and ruin your shots by achieving just the opposite effect.
[source: MiesnerMedia]
Disclaimer: As an Amazon Associate partner and participant in B&H and Adorama Affiliate programmes, we earn a small comission from each purchase made through the affiliate links listed above at no additional cost to you.


