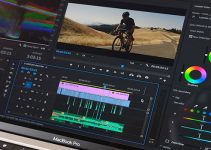
It goes without saying, working with shortcuts might save hours of your life while editing. Whether you’re an experienced video editor, or you’re just starting out, the odds are you’ve already implemented a considerable amount of short key combinations in your daily workflow.
If not, here are five essential, yet less known shortcuts in Premiere Pro CC that will not only make your life in the editing bay a lot easier, but they will also maximize your productivity over time. Jordy Vandeput is here with another excellent tutorial that covers a few more unpopular shortcuts in Adobe Premiere Pro that will certainly speed up your video editing once you implement these in your workflow.
The first shortcut Jordy suggests does multiple actions with one press of a button. Ask yourself how many times do you need to trim a clip when editing? If you use the razor tool you have to select it first, then click on the clip and delete the redundant part.
Fortunately, you can do this with a press of a single button. To trim off the beginning of a clip, just use the Q button on your keyboard. It will not only remove the first piece before your play head but also will close the gap. The same goes for the end of your clip, but this time instead of Q button you need to utilize W.
The next shortcut isn’t assigned by default in Premiere Pro CC, so it should be created first. To do so, navigate to the main menu of Premiere Pro CC and under Edit go to Keyboard Shortcuts. Then use the search bar to find the Bypass Lumetri Color Effects function. Jordy suggests assigning the “0” button, but you can opt for any other key. Now, when holding down the button you’ve chosen, you can bypass the color grading effects you’ve just applied to any of your clips.
If you often look for a clip you’ve already used on your timeline, you can simply select it directly and press the F button. It will open the original media inside the source monitor where you can make another selection and throw it back in the current edit.
The fourth shortcut allows you to move clips throughout your timeline precisely with ease. Simply utilize a combination of the Alt + arrow keys. This action will nudge your clips within time or even within different channels. It’s much more accurate than using your mouse. Moreover, if you want to nudge by bigger steps, you should hold down the shift key along with Alt + arrow keys.
Last but not least, if you want to navigate faster through your timeline, you can either use the mouse wheel to scroll, or hold the Alt key while doing so to zoom in. The action will follow the position of your mouse pointer so that you can make visible every bit and piece on your timeline accordingly.
So, there you have it! These are five Premiere Pro short keys that you can implement instantly in your editing workflow and make them part of your evergrowing shortcuts’ list.
[source: Cinecom.net]
Disclaimer: As an Amazon Associate partner and participant in B&H and Adorama Affiliate programmes, we earn a small comission from each purchase made through the affiliate links listed above at no additional cost to you.


Why have i never known about Q and W in Premiere. This has helped me to become a better man. Thank you.