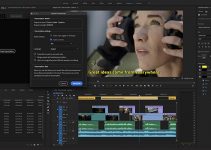
There are countless ways to enhance footage in post as every filmmaker has a unique approach toward the process. Typically, the odds are you’re going through similar steps every time you need to polish out your visuals after the edit, sound mix, visual effects and music are locked.
Whether you start with throwing a LUT or prefer to do the primary color corrections on your own, or do some other fancy tweaks and tricks along the line, there is a particular routine involved depending on the type of footage you’re working with. The latest video of Film Riot reveals Ryan Connoly’s personal workflow when it comes to perfecting images in post.
Personally, I wasn’t surprised to know that Film Riot’s team uses Premiere Pro CC for most of their projects. With the latest improvements to the software and the introduction of the Lumetri color panel, enhancing colors have never been that easy and straightforward.
Nevertheless, Ryan utilizes a few additional third-party tools along with power windows to enhance different parts of the image. For instance, he creates and tracks a mask around a specific area of the image and then makes further tweaks and enhancements inside.
First, he goes through the locked edit shot by shot and balances out the image by adjusting some basic settings such as brightness, contrast, and saturation. The next step of the process is improving skin tones and touching up actors’ faces. He utilizes two particular plugins for that task – the Red Giant’s Cosmo and the Digital Anarchy’s Beauty Box.
Both plugins let you remove blemishes and fix skin inconsistencies with just a few clicks. Be careful not to overdo when using these tools, though, as both tend to produce a plastic look when pushed too far. In the video above Ryan even showcases a practical example and shares some suggested settings when using Beauty Box that you can use as a starting point and do further adjustments from there.
Once the image is corrected and actor’s skin is softened, the filmmaker applies a LUT to customize the look of his footage by using the Creative section of the Lumetri tool and then adjusts the intensity and other parameters of the applied effect for each shot accordingly. Finally, he adds the Red Giant’s Denoiser II plugin to the mix to clean up some of the visible digital noise in the image and throws Film Convert plugin on top. The latter tool is utilized only for adding subtle film grain to the image thus making the overall look of the digital image more organic and pleasing.
What is your personal workflow when it comes to perfecting your images? Feel free to share your insight in the comments below.
[source: Film Riot]
Disclaimer: As an Amazon Associate partner and participant in B&H and Adorama Affiliate programmes, we earn a small comission from each purchase made through the affiliate links listed above at no additional cost to you.


