Sony may have released the PXW-FS5, a sort of a “miniaturised” version of the bigger and more powerful FS7, but the latter still remains a very popular camera of choice for many filmmakers and DP’s working in the broadcast, online and corporate video production world. Sony continues their series of Sony FS7 tutorials by revered DP Alister Chapman, who this time dives into CineEI mode and S-log2/Slog-3, Exposure Index and also the various Focus tools available in the Sony FS7. For those of you who have yet to catch up on the previous FS7 tutorials by Alister Chapman you can do so here and here.
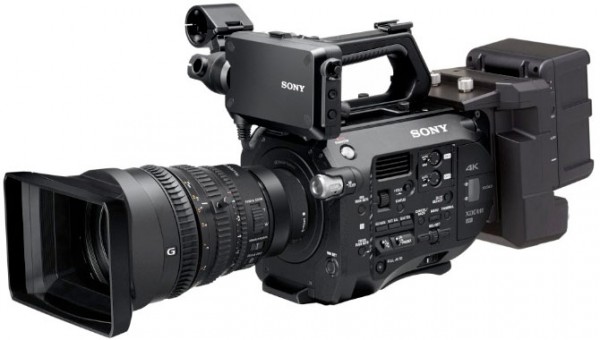
Sony FS7 Official Tutorial Video #6: CineEI Mode and S-Log2/S-Log3
As opposed to Custom Mode, the other mode available in the FS7 is CineEI. This mode is capable of allowing you to capture the best dynamic range out of the camera when used correctly. Unlike Custom Mode, which is more of a WYSIWYG or “what you see is what you get” mode resembling a broadcast camera used in ENG and other fast paced TV workflow, CineEI mode allows you to use S-log2 or S-log3 giving you a more flat image but still recording the highest dynamic range.
Choosing the shooting mode (Custom vs CineEI) is done in the Base Setting menu of the FS7. After selecting CineEI you have to select the colour space – and the options are S-Gamut/S-Log2, S-Gamut3.Cine/S-log3, and S-Gamut3/Slog3.
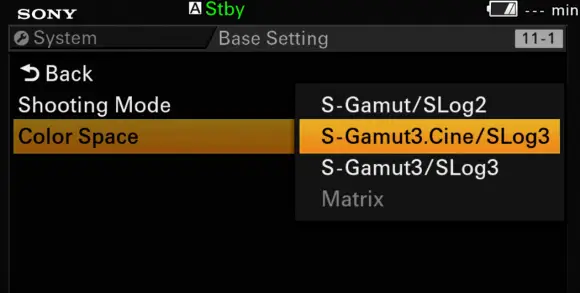
Contrary to what some may thing (present company included) S-Log3 and S-Log2 have the same dynamic range, but depending on the colour space selected – the range of colours captured is different. S-Gamut and S-Gamut3 capture a broader range, while S-Gamut3.Cine captures a smaller range.
Regardless of this however, S-Gamut3.Cine would be easier to grade for most productions, while still delivering excellent picture, rendering it the most popular choice for most shooting situations and Alister’s recommended colour space. Note, that S-Gamut3.Cine is only available with S-Log3, not S-Log2.
Sony FS7 Official Tutorial Video #7: Cine EI and Exposure Index
A few things of note here:
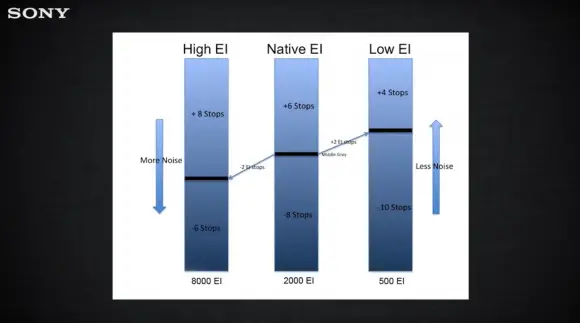
- In CineEI mode the FS7 always recorders in its native ISO 2000 – resembling a film camera, which enables it to capture its maximum dynamic range of 14 stops.
- You can “rate” the camera lower, let’s say at ISO 1000 or 500, but this only affects the image in the Viewfinder, not the recorded footage.
- The advantage of rating the camera lower in certain situations is to have less noise in shadow areas.
- In other words – if you compensate for the lower rated ISO of 500 you’d have to open up the iris with 2 more f-stops in order to have a properly exposed image as your viewfinder will show you a darker image when dropping from 2000 to 500 for example.
- Changing the EI (exposure index) and subsequent aperture compensation would impact the amount of noise in the final image, not the dynamic range, as it is all recorded at the native ISO 2000.
- Shooting at a lower ISO improves the Signal to Noise ratio
- Changing the EI only changes the brightness of the Monitoring LUT (MLUT) not the underlying recording.
- Shooting at a lower EI/ISO impacts the amount of Highlight headroom you have for overexposure (see graph below).
- For brighter exteriors scenes it is preferable to shoot with higher ISO’s and alternatively in lower light situations with Lower ISO values as this way you have more stops of DR to work with. It may sound a bit counter intuitive, but in CineEI mode not just in the FS7, but in other higher end cameras like the ALEXA for example the same principle in general holds.
- Alister recommends using EI of 1000 or 800 for general purpose shooting for pleasing results with less noise.
Sony FS7 Official Tutorial Video #8: Focus Control and Focus Aids
Here’s some useful points from the above tutorial:
- Autofocus works correctly with Sony E-Mount lenses or A-mount lenses via the LA-EA3 ($198 at B&H) or LA-EA4 ($348 at B&H) adapter
- The Focus ring on the Sony 28-135mm f4.0 Zoom Lens (which comes with the FS7K version) can be pushed back to allow for full manual focus on the lens only. The position of the Auto-Focus switch on the FS7 will not matter in this case as the lens would be manual mode only. Sliding the ring forward enables AF – via the AF button on the side of the camera.
- One Push AF – sliding the focus ring forward and flipping the AF switch to manual – gives you the ability to still use One Push AF to set focus accurately for example at the start of an interview and prevent focus hunting.
- Three Focus Aid Tools:
- Peaking – via dedicated button, assignable button and in different colours – B&W, Red, Yellow or Blue.
- Focus Magnifier – 4x or 8x time magnification in Viewfinder. Usually assigned to button #4, but can be assigned to others. Can be used while recording, as it only affects the viewfinder and outputs, but not recorded images.
- Focus Assist Indicator – square centre box with bar indicator showing you if the image is in focus.
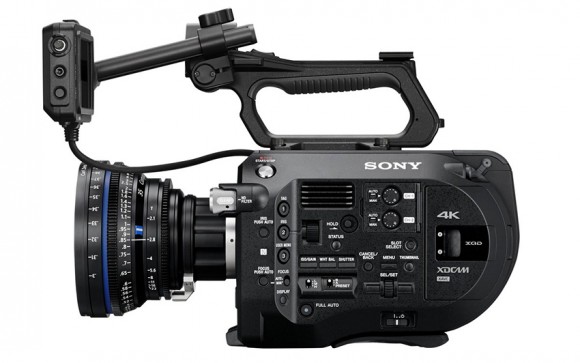
Sony FS7 Features
- Super 35 Sized CMOS Sensor
- Sony E-Mount
- 10bit 422 native internal recording
- DCI 4K (4096 x 2160) Up to 60p
- UHD Up to 60fps, HD Up to 180fps continuous
- 4096 x 2160 Via External Recorder
- XAVC-I, XAVC-L, MPEG-2
- XAVC-I Up to 600 Mb/s
- Dual XQD Memory Card Slots
- Dual HD/3G-SDI & HDMI Output
- Ergonomic Handgrip with Camera Controls
Order Links:
Sony A-Mount to E-Mount Lens Adapter with Translucent Mirror – $348
Sony A-Mount to E-Mount Lens Adapter – $198
Sony FS7 Body Only – $7,999
Sony FS7K with 28-135 f4.0 OSS Zoom Lens – $10,499
Sony XDCA-FS7 Extension Unit – $1,999
Disclaimer: As an Amazon Associate partner and participant in B&H and Adorama Affiliate programmes, we earn a small comission from each purchase made through the affiliate links listed above at no additional cost to you.


