I can still remember the countless hours I spent syncing all the video and audio files of my debut feature film The Sixth Day in a post some years ago. The now popular Plural Eyes plug-in still wasn’t an option at the time and the only way I was able to complete the process was by utilizing the good old and well-trusted clapperboard on set and then syncing and matching up all project files manually in post-production.
Actually, I was mixing the process with parallel transcoding of all of my media files, but still I had the feeling that this was extremely tedious and time-consuming workflow. Fortunately, if you plan to start shooting your next film project in the upcoming days you have an excellent option at your disposal. Ahead Fred Beahm shows how to sync your film by utilizing waveform and how to use the sound mixer’s metadata to automatically name your footage.
Davinci Resolve 12 – AutoSync+AutoName from Fred Beahm on Vimeo.
The process is really simple and straightforward, even though there is some work your sound guy need to do in advance on set to make this technique work for your project. It’s important to note that the metadata of your audio files should be added in advance while the principal photography takes place. Of course, it can be easily done with most of the professional field recorders available out there as most of them will let you enter a specific meta data related to your audio files.
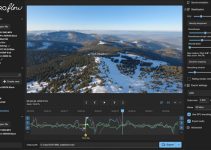
The first step of the post-production process is to throw all your audio and video files in a single bin in DaVinci Resolve 12. You will be able to sync all the clips by right-clicking on all files and choosing Auto-Sync Audio Based on a Waveform. Resolve will analyze both the video and audio clips and will match them up using its algorithms just as any other NLE that provides similar functionality.
The easiest way to check whether your clips are synced is to toggle the List mode in Resolve and look for the number of audio channels your video files have. Usually, they will be more than two as all these files will have not only the reference audio from your camera but the added audio recording from your external audio system as well.
Once you have all video files synced you can rename them accordingly. You simply need to access the Display Name of your project files as this parameter is directly inherited from the File’s name by utilizing the so-called render tag in Resolve.
By using the following tag provided in the video above (%{scene}%{take}%{shot}) Resolve will pull the necessary metadata from the already synced video files automatically and will name each file accordingly. Everything you need to do is select all your already synced files in Resolve, right-click on them, navigate to Clip Attribute, under the Name tab tick the Display Name, paste the render tag in the field and hit OK.
This is how you can effortlessly sync and properly rename all your media of your project in less than five minutes. This process should work seamlessly and flawlessly regardless of the number of files related to your project. In this particular case, Fred Beahm tested the workflow with 100+ media files downloaded directly from his Sony A7S, but I tend to believe that this technique would work even with 1000+ files or more.
Overall, this tip is a no-brainer and a huge time-saver, especially considering the amount of time one should spend in order to rename all these files manually. I am curious as to what is your personal workflow on renaming and organizing your project media? Feel free to share your opinion in the comment section below.
[source: Fred Beahm]
Disclaimer: As an Amazon Associate partner and participant in B&H and Adorama Affiliate programmes, we earn a small comission from each purchase made through the affiliate links listed above at no additional cost to you.


Good Tip Thanks Fred. Can you get the Audio TC to transfer to the Video files. I notched you had 00:00:00TC starts for each video clip.
How do you then mute the camera ‘guide audio’ from the synced clips?
Have you found any way of getting these display names (with scene and take info) to transfer over as clip names to other NLEs? I’ve tried everything except Avid ALEs, and no luck whatsoever. I don’t want to rename filenames during export, simply have the scene and take info transfer over via XML (as clip names or metadata).
Is the waveform feature available only on paid da vinci resolve 12?
No, it should be available on the free version as well. Just make sure you have write access in the folder configured for render cache. It’s under the first configured volume in Media Storage in Preferences. Hope that helps!
Thanks a lot! how can I export my synched multichannel audio with resolve 14? I would like to edit my eight-channel files with premiere afterwards, but cannot find any options for channel routing.