Audio drift is one of those extremely annoying and frustrating issues that can easily ruin your footage and simply make it unusable. The overall post-production workflow in these occasions can turn into a real nightmare so you’d better consider it in advance and find alternative ways to avoid this issue before you start filming. As a rule of thumb to stay away from this type of situations ensure that both the sample rate of the audio of your camera and your external recorder are the same.
Besides the fact that most of the cameras record audio at 48,000Hz sample rate, there are others, the majority of smartphones included, that utilise 44,100Hz during recording so keep that in mind, especially when you are filming with such a device.
The best way in these instances is to use a mic that can be plugged directly into your smartphone or simply shoot shorter clips. It’s also recommended to clap two or three times at the start of each clip or use a clapper board instead. If all of the above still doesn’t help here is a quick and easy way to fix this issue.
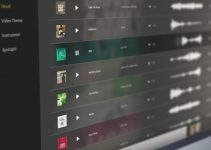
As Curtis Judd suggests you can send both the clip and external audio that are out of sync directly from your Premiere’s Timeline to Adobe Audition where you can use the Automatic Speech Alignment tool for further adjustments.
In Premiere Pro highlight both the video and the external audio you want to sync and navigate to Edit, choose Edit in Adobe Audition and select Sequence. In the dialogue box under Selection make sure that you’ve chosen Entire Sequence and all the boxes below are checked, then click OK.
Adobe Audition will open up where you should see both the video clip with the external audio below. Now you need to select the two audio tracks and by navigating to Clip choose Automatic Speech Alignment. In the dialog box first set your Reference Clip.
In this particular case, Curtis Judd picks the original audio provided with the video clip and chooses either the Left or Right channel of the Stereo Mix. Both options should work just fine. Under Unaligned Track select the external audio clip.
All in all, the Alignment algorithms of Adobe Audition provide three main options so it’s recommended to try out all of them depending on the type of audio you want to sync. Generally, Adobe Audition will stretch the external audio to get it back in sync and thus taking care of the drift issues. If there is some noise in the original audio you may want to check Reference clip is noisy to reduce it. This way Adobe Audition will de-noise the audio in order to provide more accurate results in the end.
After analysing has finished, export the already synced audio clip and open it back in your NLE, thereby continue with your editing. This workflow isn’t perfect nor the best possible solution available, yet it’s still a viable option and way better than the alternative of costly re-shoots.
[Source: Curtis Judd YouTube Channel]
Disclaimer: As an Amazon Associate partner and participant in B&H and Adorama Affiliate programmes, we earn a small comission from each purchase made through the affiliate links listed above at no additional cost to you.


